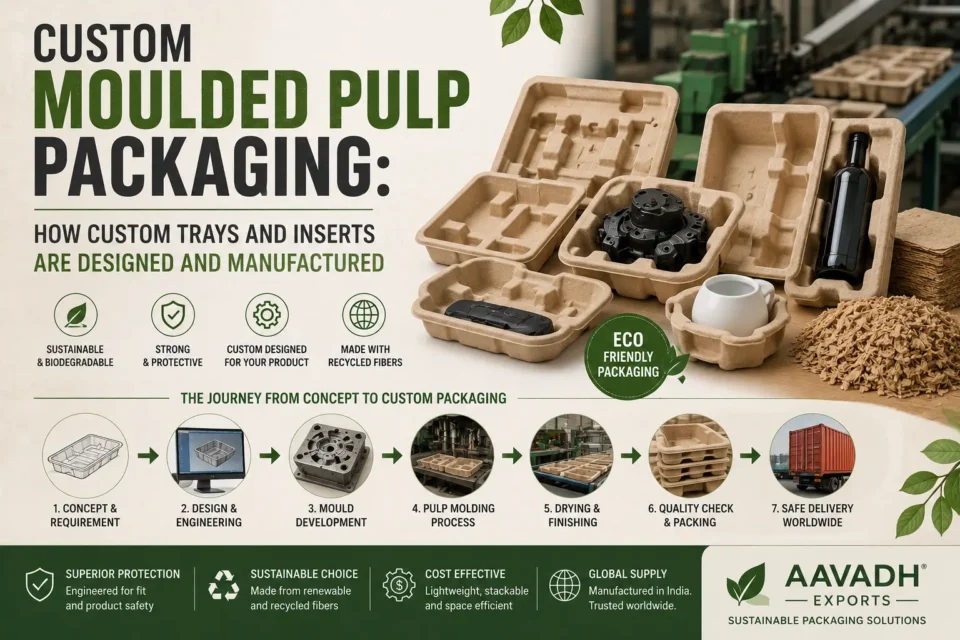

Glass bottles, jars and ceramic products can share a packaging material while needing very different support arrangements. Our wine and bottle packaging guide covers the related bottle packaging application. A narrow bottle neck, a screw-top jar and a handled mug each introduce their own contact and clearance requirements. Custom protective packaging for glass products should respond to those differences rather than use one cavity shape for everything.
Molded pulp can be considered for product-specific trays, partitions and supports within a wider packaging system. The aim is to keep items positioned and manage the conditions encountered during handling. Good planning begins with the final product, its closure and the box in which it will actually travel.
Design around the finished product
Supply the bottle or jar with its final cap, pump, lid or other closure. Include labels, sleeves and attachments that influence its dimensions or surface contact. The container used during early development may differ from the filled, labelled item that customers receive.
For ceramics, share representative units where handmade production or firing creates dimensional variation. Record height, maximum width and weight, plus handle or decorative projections. Photographs from several angles help explain the product, but physical samples are valuable for assessing fit and the surfaces that might rub against the insert.
Identify suitable support areas
A designer should understand which areas can accept packaging contact and where clearance is needed. A glass bottle may be supported around selected portions of its body and base, depending on the design. A ceramic handle should not automatically become a load-bearing point just because it fits a convenient recess.
Avoid specifying an extremely tight cavity without discussing tolerances. Variations in products and packaging can turn a nominally close fit into difficult assembly. Conversely, excessive space can allow impact between the product and its surroundings. Evaluate contact arrangement and restraint together rather than treating cavity tightness as the only measure of protection.
Read Also: custom inserts for fragile products
Protect closures as well as bodies
Bottles and jars containing liquids need attention to closure security. A protective tray cannot compensate for an unsuitable cap or sealing process. Explain whether the product contains liquid, powder or another material and whether orientation changes can create problems.
Keep insert geometry from applying unintended pressure to a pump, sprayer or lid. Check that the closure remains accessible if staff inspect it before packing. Where leakage risk exists, discuss suitable containment and testing with the relevant specialist. Molded pulp should not be assumed to provide a liquid barrier by itself.
Separate multiple products
Glass-to-glass and ceramic-to-ceramic contact can become a problem in multi-item packs. Design distinct positions for each product and confirm that the separation remains effective inside the closed box. The distance visible in an open tray may change if products lift or rotate during handling.
Pay particular attention to wide shoulders, handles and lids that extend beyond the main body. The tray may need different cavity depths or upper restraint to keep these features apart. If a pack combines several sizes, test the full set instead of validating only the largest or simplest item.
Consider horizontal and vertical arrangements
A bottle laid horizontally creates a different support pattern from one packed upright. Neither orientation should be chosen only for appearance. Consider box size, closure behavior, customer removal and the likely handling route. The preferred arrangement should be reviewed with the complete product and carton.
Upper and lower inserts can sometimes provide more controlled positioning than a lower tray alone. However, additional components also affect assembly time, material use and customer access. Ask whether each component performs a necessary function, and compare the finished arrangement with alternatives before committing to tooling.
Prevent surface damage
A container can arrive unbroken but still be rejected because its label is scratched or its glazed finish is marked. Tell the supplier which visible surfaces require protection. Inspect sample contact areas after packing trials and transport testing, including points that are difficult to see while the item is in the tray.
Depending on the surface and application, an additional layer may be considered. Evaluate its function, compatibility and effect on packing time. Avoid adding unnecessary materials simply because they are familiar. The packaging specification should explain why each component is present and how it is used.
Match the insert to the carton
Review the actual internal dimensions and construction of the outer box. An insert that slides freely inside an oversized carton may lose its intended positioning. A carton that compresses the assembly can create different problems. Samples should be checked with the box that will be used in production.
Close the carton and inspect how the upper support, flaps and closures interact. Do not judge protection solely from an attractive open-box photograph. The product needs to remain supported when the package is handled, stored and opened, and those stages should all be considered during approval.
Validate the full configuration
Agree suitable tests with a qualified packaging laboratory based on the product and distribution route. Use final or representative filled containers where fill weight affects the requirement. Define acceptance criteria for breakage, chips, leakage, cosmetic damage and closure condition before testing begins.
Record the tested box, inserts, products and supplementary materials. A successful result relates to that configuration. Changes to bottle dimensions, closure type, product weight or carton construction should trigger a review. Testing evidence from a wine bottle pack does not automatically validate a different jar or ceramic gift set.
Evaluate commercial and operational requirements
Ask about sample availability, project-specific quantities, tooling terms and repeat order scheduling. Separate development charges from recurring supply costs where applicable. Include storage space and packing labor when comparing alternatives, especially if your current packaging involves several manual wrapping steps.
For an importer, confirm how empty inserts are bundled and protected during shipment. Their condition on arrival matters because distorted or damp packaging may affect later use. Request clear handling guidance and inspect incoming samples before distributing the packaging to production or fulfilment teams.
Send a detailed custom packaging enquiry
Provide each product’s dimensions, filled weight, closure details, photographs and quantity per box. Add carton specifications, destination market and any known damage history. For mixed sets, show the intended arrangement and include every accessory. This helps the supplier assess the actual packaging challenge.
Aavadh Exports welcomes enquiries for custom molded fiber packaging based on product size and protection needs. Contact the team or email info@aavadhexports.com to discuss feasibility and sample arrangements for bottles, jars or ceramic products. Confirm the proposed application and validate the completed pack before ordering at scale.